Our Location
5th Floor, Huake Center, Lanshan District, Linyi City, Shandong Province, China

5th Floor, Huake Center, Lanshan District, Linyi City, Shandong Province, China
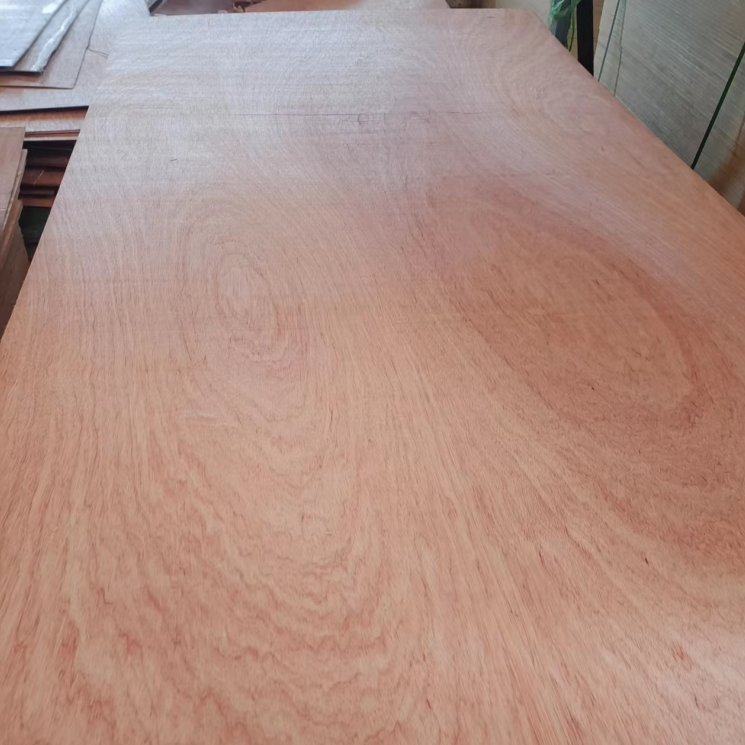
Buyers choosing plywood wall panels balance three things: the finish facing the room, the strength behind the fixings, and the panel cost per square metre. Each choice changes what the wall supports and how it looks. This guide sorts the panel families, finishes, and thicknesses, then explains how to write a wall panel specification that trades correctly between appearance and structure.
Following it, you can separate the load-bearing question from the finish question, which is the first step to a wall that looks finished and stays firm.
Wall panels fall into two families that share the veneer base but serve opposite roles. Definition: a structural wall panel carries live load such as racking, fixing, or stored weight, while a decorative wall panel covers a wall and carries only its own weight and finish.
Panel type also changes with the framing the boards cover. Steel studs, timber studs, and heavy masonry each take a different fastener pattern, so the structural family begins where the frame ends.
Structural panels brace frames, back tiling, and mount fixtures. They trade face finish for strength, and builders specify them by thickness and bond rather than by appearance. Standard sheathing hides inside walls, while some crews expose it deliberately as a utilitarian feature.
Definition: a wall lining is the panel that closes the interior side of a wall, and it can carry a moisture class, a fire class, and a finish in the same sheet, which is why the specification names all three before delivery.
In contrast, decorative panels carry sanded faces, veneer, film, or paint-ready surfaces. Crews use them for feature walls, retail display, and interior linings where the sheet is the final surface. The same core can serve both families; the face and the bond change, not the veneer structure itself.
Acoustic and fire rules can force the choice independently of looks. A corridor wall may need a rated panel even when the owner wants a plain veneer, and a feature wall beside the fire escape may accept timber only with a certified finish.
The first decision separates load-bearing from cosmetic service, and the table shows how the specification changes from there.
| Decision point | Structural panel | Decorative panel |
|---|---|---|
| Main job | Carry racking and support | Cover and finish the wall |
| Surface | Rough, often unsanded | Sanded, veneered, or faced |
| Thickness | 12-18 mm and up | 3-12 mm typical |
| Bond | Exterior or structural | Interior sufficient |
| Cost focus | Strength per sheet | Finish per square metre |
As a result, a buyer should name the role first, because the same labels mean different boards in the two services. A wall that must hold racking needs a structural panel even if the owner wants a timber look, and a wall that only needs covering should not buy load capacity it never uses.
Sizing also depends on the stud pitch: 400 mm and 600 mm centres suit different thicknesses, because the panel spans between supports before it spans the room. Keep the framing module in the calculation from the start.
Thickness follows the role and the fixing load.
Definition: the fixing rating is the weight each square metre of panel reliably holds through its anchors. Next, check the anchor spacing and the stud or frame pitch, because a thicker panel cannot rescue weak fixings on wide spacing, and oversized anchors split thin faces long before the load reaches its limit.
Board count follows the sheet size and the wall module. Dividing the wall area by usable sheet area, then adding a cutting allowance of five to eight percent, gives a working quantity that covers pattern joints and door returns without over-ordering.
Moisture grade follows the room class. Standard interior boards suit dry rooms, moisture-resistant boards suit wet zones, and exterior panels work outdoors and in unheated spaces, so the room class line should sit directly above the thickness line in the spec.
Estimating crews price wall panels by square metre and by joint count, because both drive labour. Fewer seams mean fewer passing cuts and a faster install, so larger sheets win on big open walls even when the unit price runs higher.
The finish decides how the wall reads and how much labour the installation needs.
First, choose the finish and the joint pattern together, because the eye reads the seam before the surface. Next, set the fixing pattern with a simple order.
Consequently, drawers and fixtures mount firmly where the panel meets solid supports, and seams stay tight because every edge lands on framing.
Joint style closes the finish story: butt seams suit painted flat walls, bevel-edged boards add a shadow line, and board-and-batten panels hide shrinkage naturally. Choose the seam before the finish, because the two together set the labour budget.
Walls in kitchens, bathrooms, and workshops behave differently from dry feature walls because moisture sits at the joint between the panel and the backing.
Furthermore, in continuously humid rooms the panel family should change: finished interior panels serve dry display walls, Melamine Plywood serves wipeable kitchen faces, and Commercial Plywood carries structural walls where fixture loads run high. For painted smooth panelling, MDF Board paints flat, though it needs protection in wet zones. Fire-rated and acoustic assemblies add their own layer requirements, so confirm those specs before the panel order locks.
Expansion also shows up at seams in variable humidity, so allow a few millimetres of movement at each joint rather than forcing panels tight against one another in rooms that dry and humidify seasonally.
Finally, inspect the delivered panel for cupping and bow: a panel that arrives twisted cannot be flattened by the fixing pattern, and it fails the flush joint before installation begins.
These questions arrive at the specification stage, when the finish meets the frame spacing.
Yes, with moisture care. Use moisture-resistant boards, seal all cut edges, keep gaps at the floor, and ventilate the room so condensation drains instead of pooling behind the panel surface. For frequent showers or a full bath, choose moisture-resistant board and a vapour barrier, and reseal edges after every cut on site.
Start from the fixture load. Display and backing walls take 9-12 mm, while mounting shelves or heavy fixtures needs 15-18 mm fixed into the studs, with anchors that match the panel face. Panels thicker than 18 mm rarely help a normal wall, because the fixing pattern and the frame carry the load long before the extra millimetres do.
Match the finish to the room use first, then to the timber tone. Wipeable faces suit kitchens, and natural grain suits living areas regardless of the floor colour, so the function decides before the colour wheel. Instead, keep the door and trim tones close so the wall panel reads as the deliberate surface, not the spare sheet.
Drive screws into each stud around the perimeter every 150-200 mm, starting at the top and working down. Keep the face square, drive anchors to the correct depth, and use adhesive only as a supplement, never as the main support. Count each screw into a stud and set the depth ring before the first run, because a proud head breaks any wall face you try to conceal.
Finally, separate the load from the look on the specification: name the structural thickness and bond for the wall behind the panel, and name the finish for the face in front. Buyers who split those two decisions avoid both sagging panels and unnecessary premium faces. We document the panel family, the bond, and the face finish on every order at HYY, so the wall performs the way the drawing shows.