Our Location
5th Floor, Huake Center, Lanshan District, Linyi City, Shandong Province, China

5th Floor, Huake Center, Lanshan District, Linyi City, Shandong Province, China
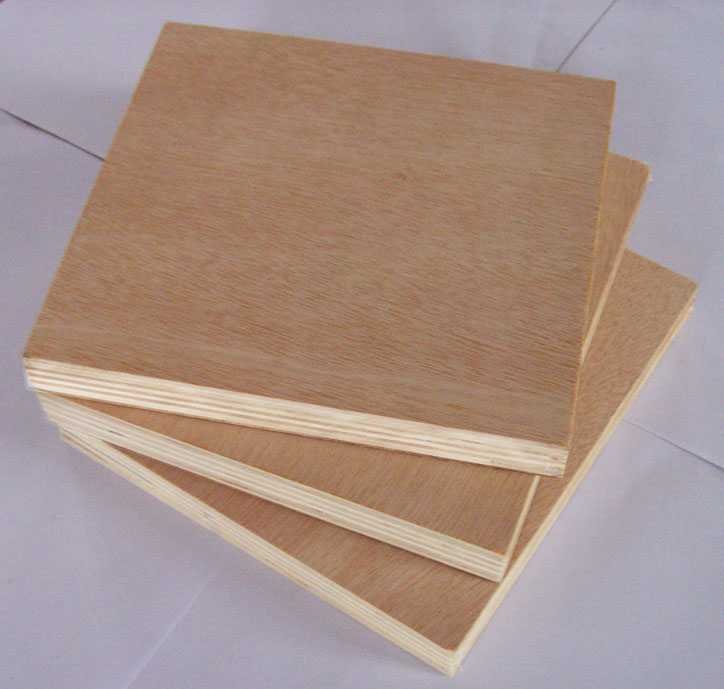
Plywood cutting tips start at the blade and finish at the edge, because a clean cut saves sanding, sealing, and fitting time on every sheet. Cross-laminated panels tear veneer faces and chip film edges when the wrong blade or speed meets the wrong support. This guide covers blades, saw tables, support, and the edge habits that turn a cutting bench into a production line.
Definition: a clean cut in plywood exits with a smooth veneer edge and no breakout on the underside, and it depends on the tooth count, the feed speed, and the support underneath the sheet.
Plywood is a sandwich of alternating grain, so a blade that suits solid wood leaves the bottom face torn where the last veneer runs cross-grain to the blade. A higher tooth count and a slow, steady feed close the gap, and a fresh carbide blade answers most of the tearing before the saw even starts.
The blade and the feed work as a pair, and a clean veneer edge is the contract between them. A shop that holds one fine-cut blade on the bench for plywood and another for framing runs the two cuts on the same saw without constant changeovers.
Sharpness shows up before the teeth do. A blade that pulls hard, browns the cut, or leaves a fuzzy face is telling the operator to change the cutter, so a schedule that tracks blade hours keeps the veneer clean across the whole sheet.
The saw station is part of the blade story. A track saw cuts in place with a consistent line, while a table saw needs a clean fence and a firm feed, so the tool choice and the blade choice belong on the same planning line.
A 2400 mm track saw blade with a fine set cuts clean veneer and film faces, while a general framing blade leaves a rough edge on the same sheet. The saw and the blade work as one system, and buyers keep a fine-cut blade for plywood unless the job only needs rough structural cuts.
Crosscutting thin sheets picks a different blade than ripping thick stock. A fine crosscut blade leaves a clean face on the 12 mm sheet, while the rip side of the bench works the structural bands, so the two cuts share the sheet but not the same cutter setting.
The blade count also follows the cut type. A fine-tooth blade gives the smooth face the panel accepts, while a fast crosscut with a coarse blade tears the same veneer, so the change from one blade to the next happens at the change of task rather than mid-run.
Feed steadily and let the blade do the work, because a fast push and a slow blade tear the face while a reasonable feed and a sharp blade slice it. The direction matters too: cuts from the good face down keep the tear on the hidden side, and a scoring pass on film faces keeps the overlay clean.
The push also carries the exit side. Slow at the start, steady through the cut, and light past the end keep the last veneer sheet from lifting as the blade exits, so the operator reads the speed of the whole pass rather than the start of the line.
Plywood cuts safely and cleanly when the whole sheet stays flat. A sheet that hangs over the saw horse flexes, closes the kerf behind the blade, and binds the cut, so support tables, two saw horses, or a foam sheet levelled under the board stop the movement before it begins.
A straight edge or a track rail carries the saw in the same line every time. Mark the cut on the good face, set the guide on the waste side as wide as the shoe allows, and cut once rather than chasing the line with a trim pass.
Support keeps the cut square as well as clean. A sheet that sits flat on a table cuts to a true right angle, while a sheet that sags at the knee cuts out of square, and the joint friction that follows is a finishing task that never ends.
Two support jobs serve different parts of the sheet. Full tables carry large panels, while small parts cut on a base board under the work, so the bench layout matches the part sizes the shop actually runs.
Order the cuts before the first blade turns. Rip the sheet to the working width first, then crosscut the parts, and cut the panel to the finish size after allowing the stock to acclimatize, because a panel that moves after cutting loses its square corners at the joint.
Thin plywood asks for its own routine. A score-and-cut pass on sheets under 6 millimetre stops the bottom face from tearing, and a backing board under the work gives the blade a clean exit, so the thin and the thick lines finish with the same edge quality.
Acclimatizing and cutting connect at the first pass. A sheet that arrives cold from the truck moves in the dry shop, so cutting on arrival and trimming after the panel settles answers the spring and the autumn cuts with the same straight edge.
The offcut schedule keeps the bench honest too. Parts nested on one sheet waste less than parts pulled from separate sheets, so the cutting order starts with the nesting plan and the panel count follows the plan rather than the habit.
Curves and profiles move to the router. A template and a guide bushing carry the same shape across every part, and a downward-spiral bit pushes the veneer into the cut rather than lifting it, so curved work keeps a clean edge on both faces.
Holes deserve the router too. Drill the plywood from the good face with a sharp brad-point bit, clamp a backup board behind the exit, and the underside stays free of blowout, which keeps hinge bores and shelf pins clean on the production run.
The router speeds up repetitive shapes and keeps them identical. A template cut once and clamped over each part repeats the profile, and a guide bushing rides the edge, so a run of twenty curved parts leaves the bench with the same outline as the first.
Holes and dados share the same direction. Drill from the good face, cut dados with the router and a straight edge, and break the sharp edges before finishing, so the assembly step receives parts that fit on the first attempt.
Tear-out nearly always comes from the accessories around the blade. A zero-clearance throat plate supports the veneer right at the blade, masking tape over the cut line stops the top face feathered edge, and a sacrificial backing sheet cleans the underside, so three small setups replace the whole tear-out argument.
The edge after the cut needs the same attention as the cut itself. Seal the fresh edge with the site sealer before the moisture finds it, and sand a fine edge only where the finish asks, so the cutting bench hands the panel to the sealing crew in the same shift. Most shop sheet stock runs on Commercial Plywood for structure, machined cores such as MDF Board for routed and painted parts, and a Chip Board line where the budget carries the flat panel. Match the cutter to the panel range at HYY before the bench starts its day.
A few seconds of setup remove the whole tear-out argument. Tape the line, check the insert, and set a backing scrap under the exit, and the sheet leaves the bench with two clean faces and a sealed edge ready for the fitting crew.
These answers cover the cutting questions that stall a shop bench and cost sheet stock.
A fine-toothed carbide blade with a low rake suits veneer and film faces, and a scoring blade or a track saw keeps the overlay clean on the exit face.
The last veneer runs cross-grain to a blade that leans through the kerf. A sharp fine blade, a slow feed, and a backing board support the exit face and stop the tear.
Cut from the good face up with a track saw or an underside-cutting circular blade. For a normal circular saw, mark and cut face down so the tear lands on the hidden side.
Masking tape over the line, a scoring pass, and a fine blade all protect the overlay. Test one cut on an offcut before the full panel commits.