Our Location
5th Floor, Huake Center, Lanshan District, Linyi City, Shandong Province, China

5th Floor, Huake Center, Lanshan District, Linyi City, Shandong Province, China
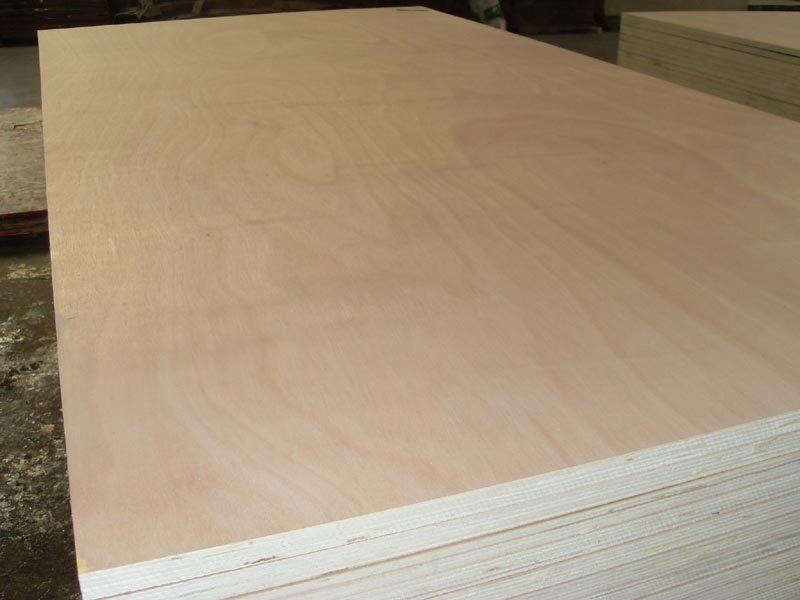
Plywood edging is the line that finishes a cut panel, and it decides whether the edge looks like work or like a product. Every straight cut exposes the inner veneers, and that bare edge invites moisture, splinters, and an unfinished face. Edging closes that line with a strip, a band, or a sealer, and the choice follows the panel, the tool, and the room it stands in.
This guide covers the edging options, the seams and the build-ups that fail, and the order of work that keeps plywood edges straight on the shelf, the door, and the carcass.
A sawn plywood edge shows the plies. The blade leaves a fuzzy line of open veneers, and that line stains, soaks, and splinters under fingers and moisture.
Edging covers the damage line. A strip or a band closes the exposed core, and a sealer locks the fibers, so the panel lives longer at the cut the builder makes on site.
The finish also turns the corner. A clean, flush edging carries the eye across the panel face, and a bare, ragged line drags a good carcass down to a rough prototype.
Definition: plywood edging is a strip, band, or coat applied to the sawn edge of a panel, shielding the exposed veneer core and giving the cut a finished straight line.
The moisture angle decides the more serious work. A shelf edge that drapes to the laundry or a cabinet edge by the sink takes a sealed band, where a dry desk edge runs a thin decorative strip.
The banding machine changes the bench economics. A hot-melt edge bander presses meters of band in a pass, while an iron and a router finish the same panel by hand, so the shop picks the strip by its volume.
A clean cut feeds a clean band. A score-cut or a carbide blade leaves a smooth edge for the strip to press against, and the joint shows the difference between a crisp seam and a ragged one.
The edging family splits into the rigid strip, the flexible band, and the brushed and rolled sealer, and each covers a different edge and a different tool mix.
| Edging type | Best for | Tools |
|---|---|---|
| Solid timber strip | Heavy use edges | Glue, clamps, router |
| Veneer edge band | Furniture faces | Iron or banding machine |
| PVC / ABS band | Hard-wearing edges | Edge bander |
| Edge sealer | Workshop panels | Brush or roller |
A solid strip gives structure. A timber batten screwed and glued along a long shelf edge adds stiffness, so the edging becomes a beam that keeps the panel straight under load.
A veneer band follows the face. The thin veneer strip glues over the edge, hides the plies, and matches the face grain, so a light furniture lines up at the seam.
The sealer suits speed. A brush coat of edge sealer locks the fibers on a jig or a cutting panel, so the workshop protects the machine stock without a banding setup.
A banded face still shows the effort. The buyer reads the flush seam, the tight corners, and the surface level, so the fitting time shows up in the panel quality.
Timber thickens panel prices. A solid oak or beech strip stiffens and dresses a shelf, while a veneer band keeps the cost low, so the edge material follows the face the product sells.
Definition: edge band oversize is the extra band width cut to allow the flush trim, and that few millimetres lets the router bit clean the band level with the panel face.
The band width follows the panel thickness. A 15 mm panel wants a 15 mm band plus the oversize for the flush trim, and the fitting step trims the band to the face.
Measure the panel before the banding. Panels vary a few tenths across the run, so the builder checks the actual sheet rather than trusting the nominal number.
Corners and returns take care. A band that turns a corner needs a miter or an overlap at the angle, and the inside and the outside edges fit differently around a carcass.
Pre-glued bands simplify the site. An iron melts the hot-melt line and presses the band in one pass, so a small shop finishes edges without a full banding machine.
Solid strip edges gain from a router. A trim bit rides the panel face and cuts the strip flush, so the over-large edging shrinks to the exact line the face keeps.
The back edge gets the same coat as the face. A panel behind a sink or a wash unit takes water at the back line, and that sealed edge keeps the carcass square where the eye never looks.
A pre-sealed factory edge saves the bench time. Panels that arrive edge-sealed skip the first coat, so the shop spends the afternoon on the build-up rather than the brush.
A moisture meter catches the soak early. The shop reads the edge between pours and catches a rising line before the swelling distorts the seam, so the seal happens at the first sign.
A two-coat edge buys the wet corner. The first coat locks the fibers and the second builds the film, and the corner that takes both coats rides out the damp season.
The edge seal decides wet life. Water finds the end grain of the cut first, and a sealed edge slows the soak that swells the core of an uncoated panel.
Apply the sealer before assembly. Coat the cut edges, let them dry, and clamp the assembly, because a seabed edge swells and distorts the join that the builder already squared.
Edges near sinks and kitchens want the full treatment. A waterproof band and a sealed back edge keep the carcass straight through the wet corner of the room.
Re-seal after every field cut. A site-trimmed panel reopens the glue line, and a fresh coat closes the seam the builder just made, so the sealing follows each cut.
A disc-cut access hole and a mitred panel keep the same rule: Melamine Plywood delivers a factory-sealed edge that carries into wet rooms without a field band.
Edge failure shows up months later. A swollen seam, a lifted band, or a stained line tells where the shop skipped the seal, so the order line protects the years the carcass stands.
A straightedge ride settles the seam. The shop checks the band line across the panel, and the strip that sits level through the length earns the pass at the router.
The order decides the seam quality. Cut the panel, seal the core, band the edge, trim flush, then assemble, and each step protects the surface the next step relies on.
Use this sequence on the bench:
The flush trim settles the final line. A router bit rides the panel face and cleans the band to the veneer, then a light sand removes the fuzz that the bit leaves.
Assemble after the edges finish. The panel that carries its edging to the assembly bench fits square, because the builders dressed the line before the clamps pulled the carcass.
For panels that spend the whole life facing weather, the film-faced sheet owns the outside duty, and Film Faced Plywood carries the sealed bonded face for formwork and wet lines.
The quality bench at HYY can confirm the moisture rating and the factory edge on the panel, so the edging work starts from a sheet that carries the right sealed line into the build.
These answers cover the edging questions that come up at the bench before the first strip goes on.
Yes, on any edge that shows or touches water. The exposed core stains and swells, while a band or a sealer closes the line and keeps the panel straight.
Edge sealer for the workshop, veneer band for furniture. Both cost little per meter, and either beats a bare sawn edge for the finish and the moisture protection.
No. Pre-glued band and an iron finish edges on the workbench, and a router trims the strip flush without a full edge bander on the shop floor.
The cut edge drinks water before the band seals it. Coat or band the fresh cut quickly, and keep the assembly dry until the edge treatment cures.